

How to install Steam Skins on Windows 11/10
Skins are essential to many users on Steam, and it'southward easy to understand why. Yous run across, with the use of Skins, users can easily customize the expect of the customer to fit their mood better. We have spoken of Steam skins earlier, but not in this context.
What are Steam Skins?
OK, and then skins are a quick and easy manner for Steam users to customize the user interface of the platform. Folks will have the chance to motility away from the dull default pattern to something more than colorful if they wish to practice and then.
How to download and install Steam skins on Windows PC
The information below will explicate in detail how to download skins and add together them to your Steam client for the desktop and the web:
- Navigate to the SteamSkins website
- Download a pop skin
- Select and download a skin
- Create a Skin folder and excerpt files
- Add together the skin from Steam'due south Settings area
1] Navigate to the SteamSkins website
In guild for y'all to have total advantage of what Steam skins have to offer, y'all must first download one or more than to your Windows 11/10 estimator as soon every bit possible. We suggest visiting steamskins.org, a not bad website that provides excellent skins for your Steam customer.
2] Download a popular skin
Once you've visited the website, you should click on the Popular tab to see all the elevation skins used by about people. At the moment, the tiptop Skin is Metro, and it has secured that position for some time. There are other pop skins, so selection the one that speaks to you, or merely go for a not-and then-popular skin. The choice is ever yours, of course.
Bear in mind; you can choose from Anime, Make clean, Colors, Dark, Light, and Soft.
iii] Select and download a pare

OK, then the next step is to choose your preferred pare and select information technology. From there, curlicue downwardly to the lesser and exist sure to click on ane of the two download buttons. One is called Direct Download, and the other, External Download.
If y'all click on External Download, a new tab will open in the web browser. When that happens, click on the Download push button again on that website.
4] Create a Pare folder and excerpt files
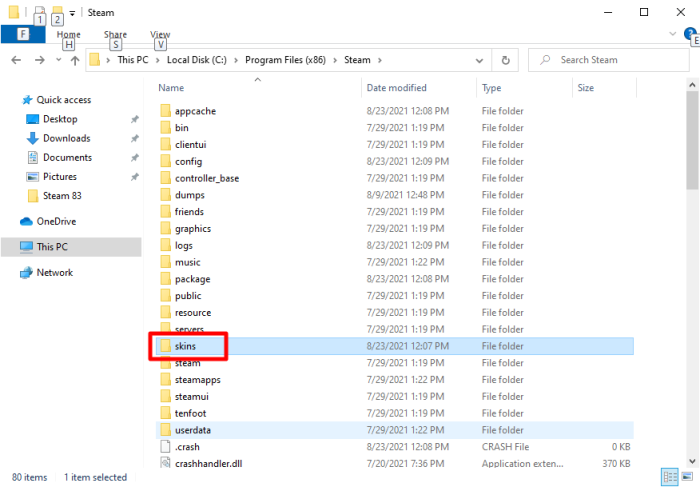
Now, before y'all can play around with your newly downloaded skin, you'll be required to create a particular folder. Navigate to C:\Programme Files (x86)\Steam, and from there, create a new binder called skins. Once that is done, you lot should render to the skin you've recently downloaded and excerpt the items from the .zip file.
The extracted files should then exist copied and pasted into the skins folder correct away. Finally, delete the .zip binder if yous wish.
5] Add the skin from Steam's Settings expanse

Later on yous have moved all the files to the skins folder, information technology is now time to burn down up the Steam customer. Once that is washed, click on Steam > Settings.
From the sidebar, please click on Interface. From there, look for the section that reads, "Select the pare yous wish Steam to utilise." From the dropdown menu, select your Skin from the list.
Later on confirming, Steam will restart, and right away, you lot should see your new Skin in action.
Where do I get Steam Skins?
Many websites like steamskins.org, steamcommunity.com, metroforsteam.com, pressureforsteam.com, steamcustomizer.com, steampowered.com offer good Steam skins that are free to download.
READ: Set up Steam Error Code 105, Unable to connect to the server.

Source: https://www.thewindowsclub.com/how-to-install-steam-skins-on-windows
Posted by: windomdediatesons.blogspot.com
0 Response to "How to install Steam Skins on Windows 11/10"
Post a Comment